
Pour monter n’importe quelle chaise gaming, veillez à commencer par fixer les roues sur la croix de pieds, le vérin à gaz, puis les acoudoirs sur l’assise.
Une fois que c’est fait, emboîtez l’assise et le vérin à gaz ensemble. Il ne vous restera plus qu’à visser le dossier, mettre les caches et placer les coussins.
You don’t want to spend too much time reading the manual to assemble your future gaming chair…
Or are you unsure about something because the drawing in the manual isn’t clear?
And the hesitation is driving you crazy because you can’t wait to finally sit comfortably in your gaming chair (and you don’t want to risk having to take it all apart and start again…)?
Then don’t worry, I’m here!
I’ve put together a whole bunch of gaming chairs since I started out, and I’m going to give you a short, easy-to-understand, well-illustrated tutorial for putting together just about any gaming chair.
For example, it’ll work for the Secretlab chairs, for all the chairs in my ranking of the best gaming chairs, the Razer, the DXRacer, BUT….
This tutorial won’t work if you have a Quersus (the backrest doesn’t attach the same way).
In short, for 95% of gaming chairs this will be ok, even the lesser-known ones like the GT Omega Pro!
So let’s move on!
| 🔧 Tools:️ | Screwdriver & Allen wrench |
| ⚙️ Screwdriver: | Optional |
| 🪜 Steps: | 5 |
| ⏰ Time: | 20 minutes |
Here’s what you need:
I understand that it’s not always easy to assemble your first gaming chair when you’re not used to it.
It may seem worrying and stressful at first, but it’s happened to me too.
There you are, faced with a huge box full of parts to assemble, and it can sometimes be scary.
So I hope to save you the trouble of following this assembly guide.
You have two options:
The choice is yours! And without further ado, here’s the guide!
To begin with, let’s start with the easy part:
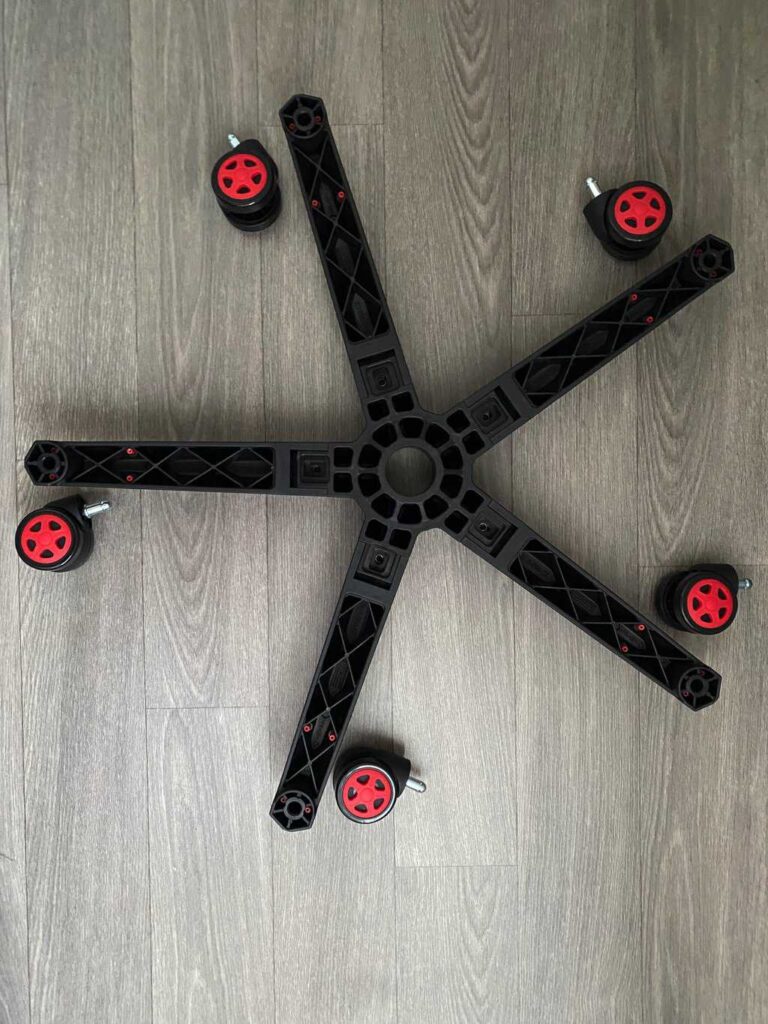
You’ll need to attach the castors to the foot cross.
Don’t hesitate to use a little force until they’re securely in place.
You should feel a sort of “click”, which means the castors are securely in place.

Now that you’ve fixed the castors, this is what your foot cross should look like.
We’ll now move on to the gas strut, which, as you’ll see, is just as simple.

To get into the right position, put the castors in contact with the ground.
Then take the jack and place it right next to it, so you’ll have no doubts about which way to push it in (yes, that happened to me too).
And for those of you who like to understand the whys and wherefores…
The jack won’t balance on your floor if you put it the wrong way round, so you can easily be sure you’re putting it on the right side.
In the case of this chair, the blue part should point upwards, but sometimes this part is black, red, it depends.

Next, you need to insert the jack into the hole in the center of your chair’s leg cross.
I’ve taken a zoomed-in photo so you can see what it looks like once the two are in place.
Again, don’t hesitate to push it in well.
However, don’t worry about this either, because when we fix the seat, it’ll push it in as far as it will go, in any case.

Now, this is what you should have in front of you.
Now all you have to do is take the little round things (no idea what they’re called, I confess) that protect the cylinder and…
Put them around the cylinder!
Just be careful, the thinnest first, then you put them in order of width.
The widest goes last.

And as usual, to make the process as easy as possible, here’s a close-up photo to show you the final result.
Are you happy?
Well, it’s good news for me too, so let’s move on to step 2!
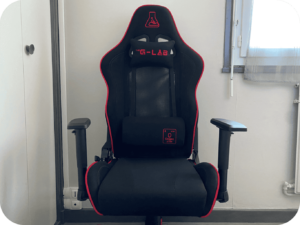
(But just before I do, you should know that I’m currently assembling a K-Seat Oxygen from The G-Lab, and that for this model you’ll need to screw on the foot cross).

This is what it should look like if you have a K-Seat Oxygen.
This is the only chair I’ve ever had to screw the foot cross onto, so don’t worry if yours doesn’t have it!
It’s neither better nor worse, it’s just easier to fit into a package.
Now let’s get down to step 2!

Now you’ll need to take the seat and turn it over, facing you.
Place the side where the backrest will be attached opposite you (easy to recognize, it’s the one with the metal bars for attaching the backrest), as it’s easier to assemble this way.
For the armrests, it depends on your gaming chair.
As a general rule, brands indicate on the armrest “R” for right and “L” for left.
If it’s not indicated, as a general rule, the thinner side is the one on the side of the backrest.
But in this case, trust us and all you have to do is screw them on.
Now you’ll need to take the seat and turn it over, facing you.
Place the side where the backrest will be attached opposite you (easy to recognize, it’s the one with the metal bars for attaching the backrest), as it’s easier to assemble this way.
For the armrests, it depends on your gaming chair.
As a general rule, brands indicate on the armrest “R” for right and “L” for left.
If it’s not indicated, as a general rule, the thinner side is the one on the side of the backrest.
But before you start screwing them in, I’ve got a little tip for you.
There are two ways to screw in your armrests.

You can screw them in so that they’re as close to the seat as possible.
This is a good idea if you don’t have very broad shoulders, and I’d advise you to do it in that case.

The other option is to screw them in so that the armrests are slightly further away from the seat.
This will save you a few centimetres in width if you’re a really wide person.
Now all you have to do is screw the two armrests together and you’re ready to go!

And presto!
Here’s what it looks like when it’s done.
Now we’ll attach the tilting mechanism to the seat!

The toggle mechanism is what I’ve just placed in the center.
How do you know you’ve put it on the right side?
Normally, it’s almost always written “FRONT” for the side of the mechanism that should face you.
When I say facing you, I mean at the end of the seat, i.e. opposite the backrest side.
IF this doesn’t make a lot of sense, take a look at the photo!

Then screw it on, and voilà!
Now we can move on to step 3.

This step will be very quick: just take the cross-leg to which you’ve attached the gas spring, and the seat.
All you have to do is insert the end of the gas spring into the hole in the rocker mechanism.

This is how it should look.
(Take heart, we’re nearing the end, the hard part’s over).
Let’s move on to step 5!

You’re going to turn your seat so that the castors are on the ground, and place the backrest on the seat.
(Just as in the photo).
If there are two of you, it’s easier to assemble, because if one person can hold the backrest while the other screws it in, that’s great.
As I’m on my own, I tend to use a wall as a support, so I don’t have to exert too much force.

Next, you’ll need to screw in the “rigid” side where the lever for adjusting the backrest linkage is located.
(As you can see in the photo).
I know that some chairs don’t have this, and in that case, you can start with whichever side you like, it won’t make any difference.

Do the same on the other side, so that both sides are well screwed in.
Then, once this side has been screwed down, don’t hesitate to give the other side a little tug too, just to be sure.
If all’s well, we’re now ready to install the covers!

Please note that the covers are not interchangeable.
Each cover goes on its own unique side.
The “right” cover always goes on the side where the backrest recline lever is not located.

Once you’ve identified it, you need to insert it as shown in the photo.
I’d advise you to start by pushing in the bottom first, then the rest of the way, just force it in a little so that it fits properly.
Once this is done, you’ll need to insert a small screw into the last hole shown in the photo.
Once you’ve screwed this in, all you have to do is fit the last little cover.

Once you’ve got it right, that’s how it should look.
Now all you have to do is do exactly the same on the other side.

As I told you, the “cover” on the side of the chair that has the lever for tilting the backrest is totally different and less straight.
That’s how you can easily recognize it.
Fix it, and let’s get on with the assembly!

As for the other side, don’t forget to screw in the little screw that goes in there.
Then we can put on the last little cover!

And that’s it, I’ve put the cover in the last little hole left and the chair is now finally assembled!
However, if you have cushions with your chair, follow me to step 5, as I’ll show you how to put them on and tell you what they’re for.

If you’ve chosen a chair with a minimum of quality, you’re bound to have two cushions with it.
The neck/headrest cushion (the smaller cushion in the photo).
And the lumbar cushion (which is the larger cushion in the photo).
However, if you’ve chosen a very high-end gaming chair, chances are your lumbar cushion is already built into the chair (and adjustable via a knob on the side of your backrest).
And sometimes, as on the Secretlab for example, the headrest is magnetized, so you don’t even need to attach it.
On the other hand, these are textbook cases, and I know that not everyone can afford to spend so much money on a chair.
I just thought I’d mention it so that those of you in this situation don’t panic.
So, how do you place these cushions?

The headrest is fitted to the top of the backrest of your chair.
All you have to do is pass it through the holes at the top of the backrest.
That’s what they’re for.
As for height, the ideal place to place the cushion is at the nape of your neck.
To give you a point of reference, if you’re wearing a t-shirt, that means the cushion should be slightly above your collar (well into the hollow of your neck).
This is good for ergonomics, as it keeps your neck in a neutral position.
As a result, you won’t feel your neck being “pulled”, and you’re even less likely to have a sore neck at all.

Little tip: don’t forget to fasten the straps! (laughs)
Now that you know all about this cushion, let’s move on to the most important cushion of all…
The lumbar cushion!

The one for the lumbar region is very, very useful.
Thanks to it, the “S” curve of your back can be reproduced.
It ensures that your lower back doesn’t suffer after 20 minutes of sitting.
In short, it’s this cushion that’s going to provide support for the whole lumbar region of your lower back.
With this cushion, you won’t end up with a rounded back, sitting awkwardly, or feeling your lower back tugging at you.
Placing it correctly is therefore essential.
But I’ll explain where to put it a little after I’ve explained how to attach it.
So first, thread the straps under the backrest (as I’ve done in the photo).

Once this is done, you’ll see the two straps hanging down from the other side of the chair.
Now all you have to do is grab them and fasten them by passing the other two cushion straps through the hole in the top of the backrest.
In case I haven’t explained myself well (I confess I don’t necessarily find it clear myself)…
I’ve taken a photo to clear up any doubts!

Now that’s how it should be fastened!
Now you can enjoy your gaming chair to the full!
Here’s the final result:

How satisfying to see your gaming chair finally assembled!
And as I promised to explain, the lumbar cushion is positioned just above the waistband.
You can get your bearings by using the waistband of your pants as a reference point.
In any case, don’t neglect the importance of this cushion – that’s my biggest piece of advice.
You’ve now assembled your gaming chair, and all that’s left to do is enjoy it to the max!
And if you’ve got a fellow gamer who’s about to buy a gaming chair, don’t hesitate to share this guide with him – he’ll thank you!

Thomas is the creator/editor of this site. A very passionate gamer since his early childhood, his mission is to help you choose an important part of your set-up: the gaming chair.